
How to add Image in your model...
After you created model in pro/Engineer like in basic modeling I, you can add an image in your model. Now, first requirement to adding image you must have an image with proportional dimension with your models in pro/E. You can create your image by Image-processing software like Photoshop or CorelDraw, or may be you have been your pictureJ.
TIPS for creating your image: The better the resolution of the image, the easier it will be to match geometry, and give it name by single name without space name.
Here is step to adding image in your model:
- Open your model which you want to added an image.
- Select View -> Color and Appearance. In appearance editor dialog box add a color by pressing Plus (+) sign, you can change a color as you wish and then in assignment dropdown list choose surface option and then pick surface which you want to put your picture and press apply button for changing color.
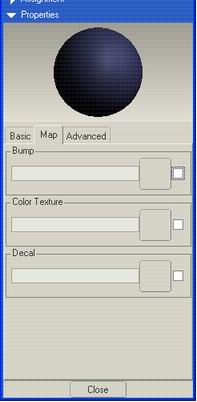
- Still in appearance editor dialog box select properties and then go to map tab and give checklist sign on bump field. See picture.
- Press square button on bump field location on left of checklist. Appearance placement Dialog Box appear, and then press Plus (+) sign to import your picture. Select your picture which just now import.
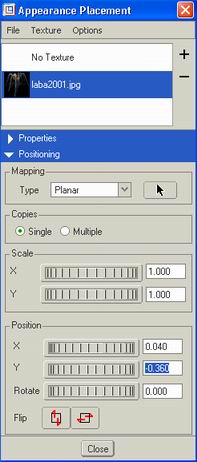
- Choose mapping type with planar option and then you can select copies type with single or multiple depend on your design. After applying assignment in appearance editor dialog box. Press close in Appearance placement dialog box.
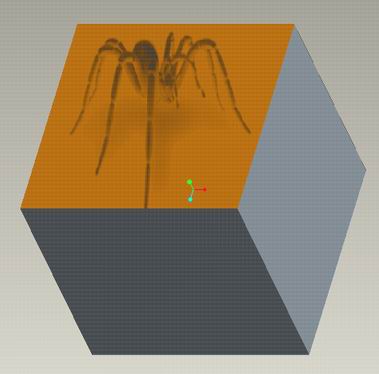
- Press apply button in appearance editor dialog box. If position or size does not match with your design, you can scale and positioning or rotate your picture by back to appearance placement dialog box. Your design should look like this picture.
Enjoy….
Tutorial selanjutnya...Feature Pattern di sini anda akan di tuntun dalam membuat pattern pada pola kurva.


0 comments:
Post a Comment